
IS300 - W58 manual Swap and other updates


Feb 2019

Dec 2019
daily drive and aesthetics
True to myself the daily drive has become the new project but in comparison to the last car the IS300 is still comfy to drive to work at 5am and between home and track events.

Visually I really like the height and way it sits at the moment, pretty low all round but still able to make it in to most driveways with minimal issues. I don’t mind the Elegant Sport kit and they’re pretty available in the local market but I think a roof wing and at least front bumper would ultimately be the end goal in terms of kit. However I did manage to find a C-West style rear bar close by and had it painted by a friend and also sourced a L-tuned style rear wing from overseas to have painted and fitted.

Car prep for halfway hangs 2020

C-West style rear bumper from JetSpeed


An idea I had floating around for a while finally ended up finished but I’m still unsure about the end result. I think with clear taillight lenses and LED controllable lights the effect I’m after will be achieved but for now I think I'll end up putting the plain clear foglights back in.

tire courier from Sydney Motorsport park

New camera setup for 2020

At this point the car looks alright, the next step was to make it drive better and a few trips up the coast to some big drift events were making the itch to begin actual mods a whole lot harder to resist.
Getting ready for some seat time
I had been talking to Ben from Cursed Sundays DC about his JZX100 setup and what he would recommend for some beginner wetpan days. We agreed that a simple setup for first time was best and it doesn’t get much simpler than a decent set of steer tires and some lock washers.


These specific examples are from URAS and cost $18 AUD off RHDJapan but I know that there are other brands out there that are equally as affordable. They sit between the rack arm and the inner tie rod replacing the locking flat washer that is fitted from factory. The install is pretty easy and I used high strength red loctite to retain the rods.
I forgot to get a inward toe photo but from comparison to other 1IS’ it seems about the same as stock. Outward toe however sees a decent increase considering the cost of the part with no further modifications required.
Also on order are a set of rear adjustable toe and traction arms from Hardrace but the global pandemic has delayed their arrival. My alignment remains eyed in until further notice (¬_¬;)
Getting started on the manual swap
Up until this point I had been the typical “Yeah I want to manual swap eventually but the auto goes alright” but having friends with Toyota’s gave me easy access to a decent manual box. The W58 from a mk4 supra is the same gearbox my friend David has in his blue BN Sports IS300 which meant I also had access to information and first hand experience with the swap.
A weekend affair removing the engine and gearbox from @Val02j’s supra for his build saw the w58 land literally in my boot and follow me home along with the tailshaft, flywheel and slave cylinder.

pulling a motor is all fun and games with friends around

before

after
There were a few small things I wanted to do before installing the box, cleaning all the old gunk was high on that list so I could inspect all the components and casing.

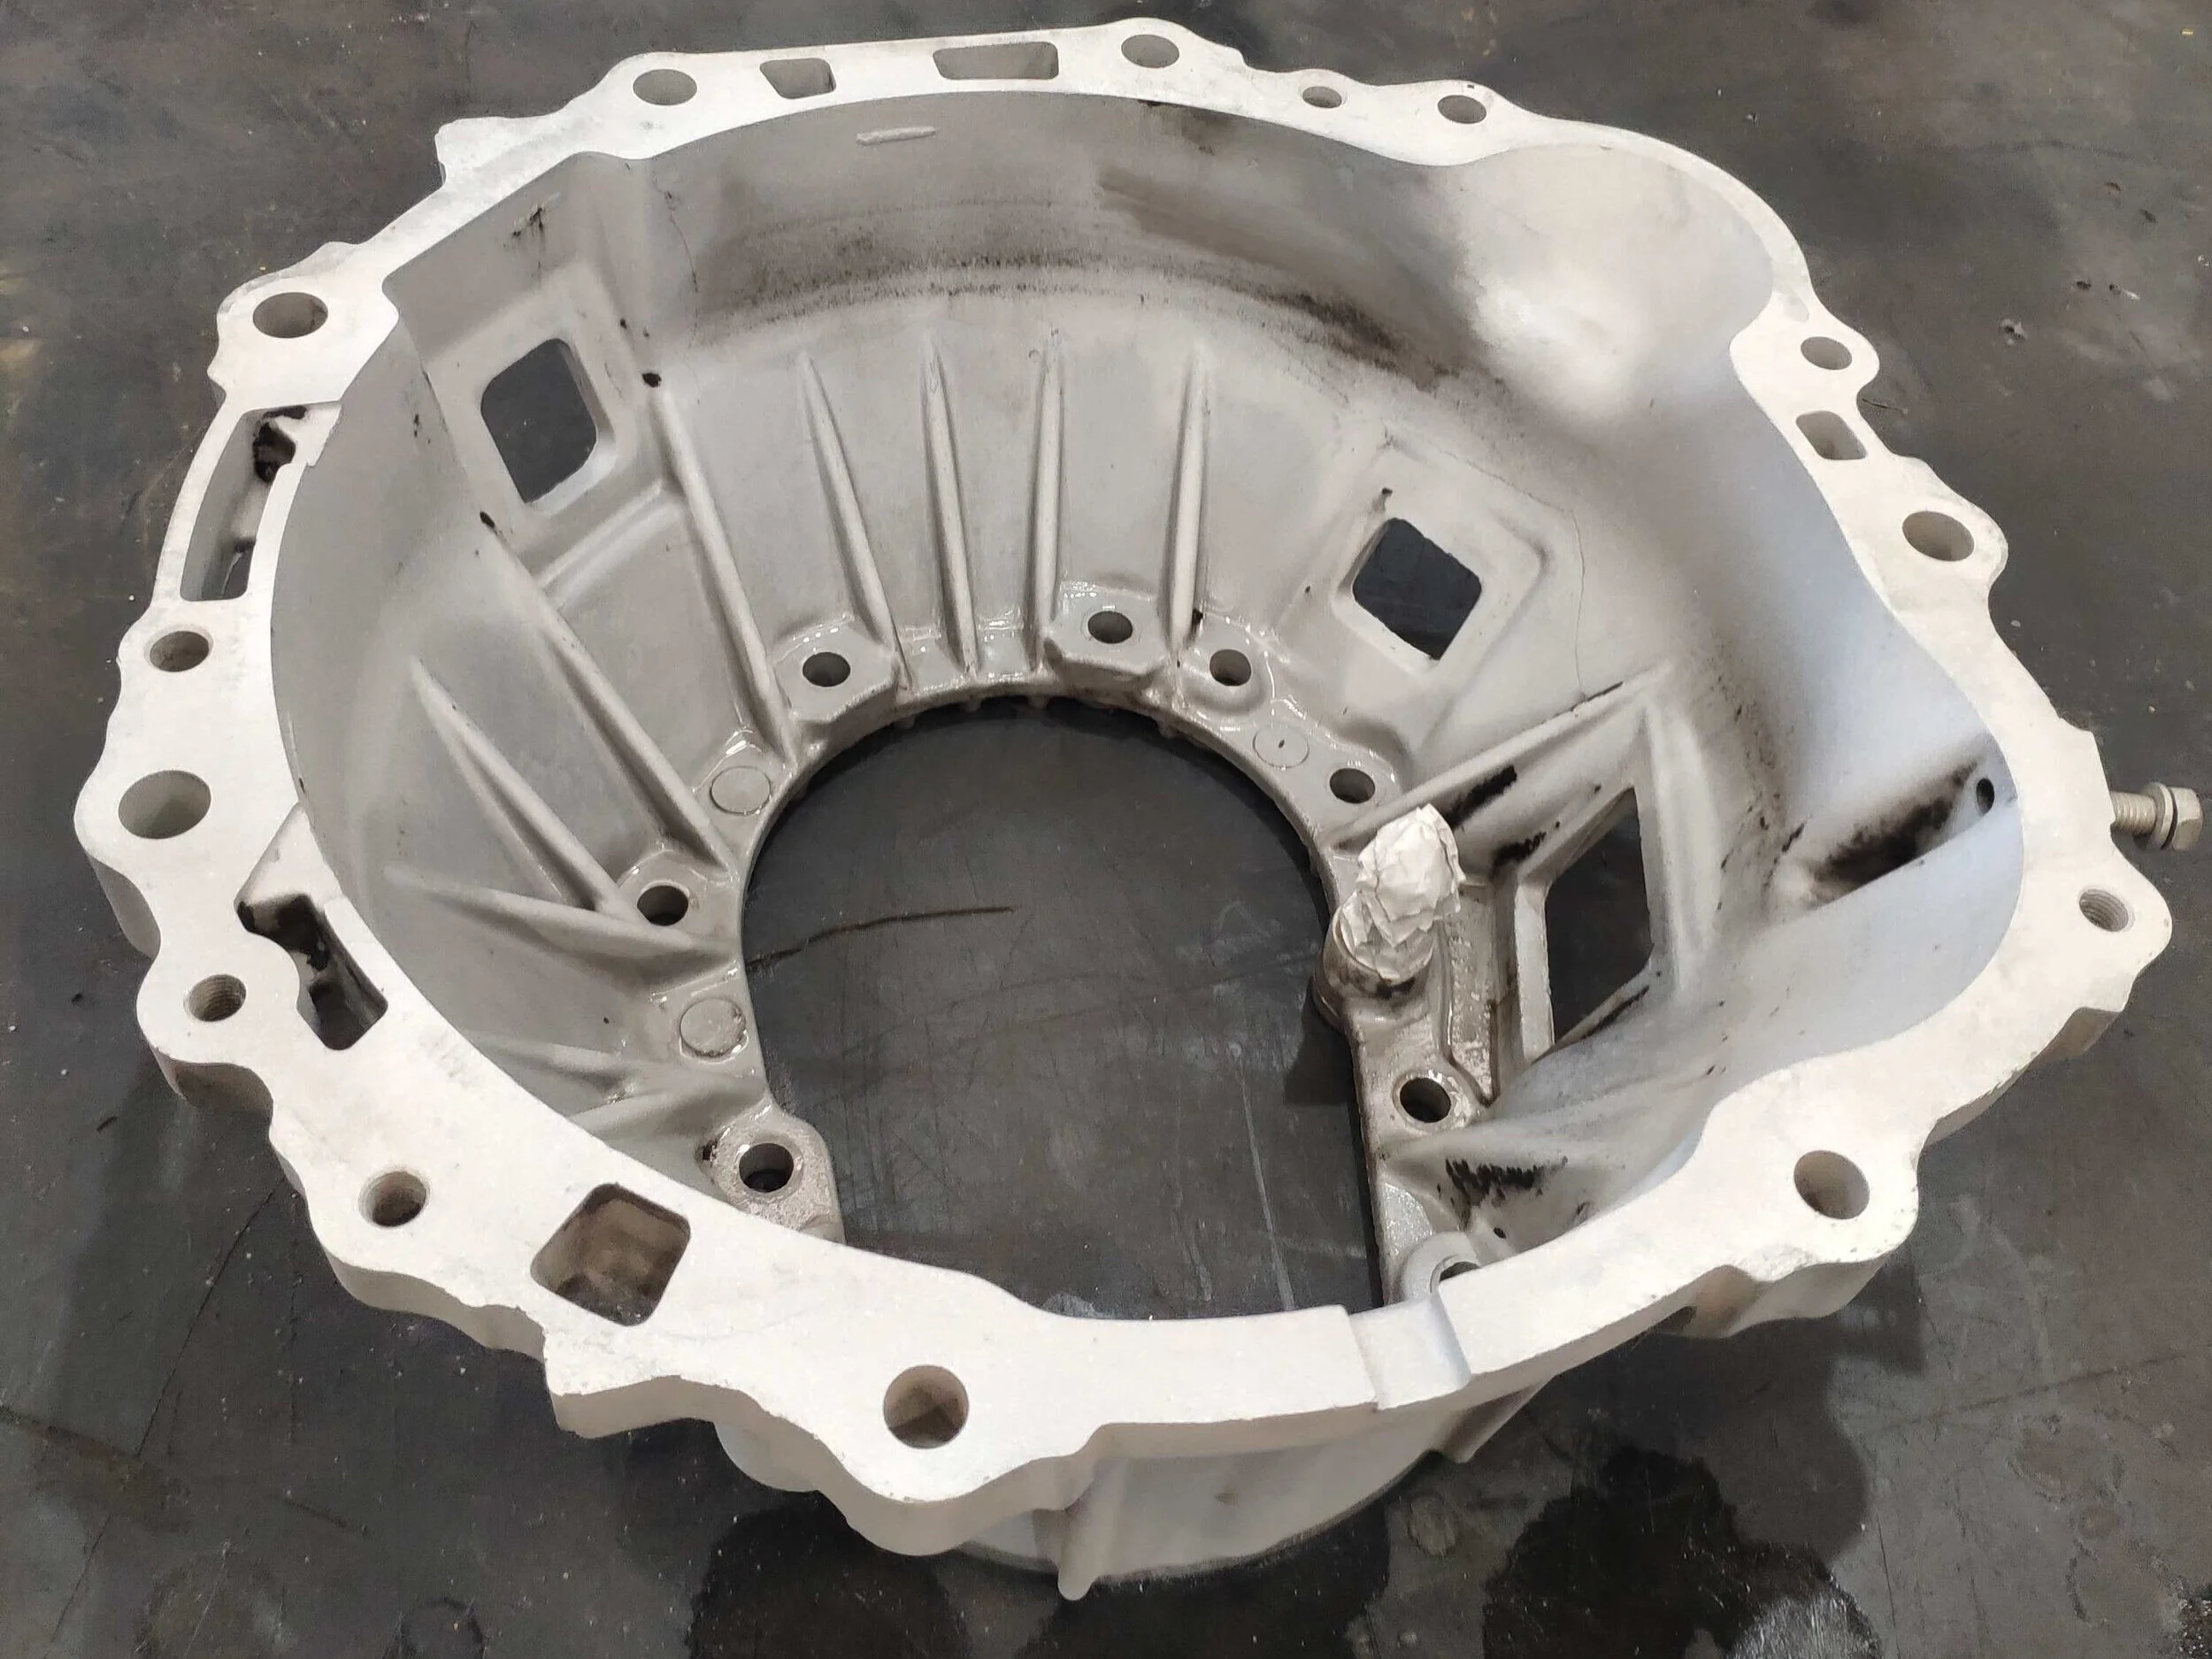
Everything seemed to be in pretty good nick, no cracks or big chunks missing. Even the clutch release bearing felt alright but it was getting replaced anyway. A bit of scoring on the end of the input shaft but not much I can do about that, a new spigot and send it. The trans felt smooth to spin and there wasn’t any excessive play in the shaft, all in all seems like I won’t need to split the casing and replace anything inside.

new shift bushing


New solid bushing kit all around on the tripod with an oem kit for the shifter assembly itself should tighten everything up without making it too notchy.

All tidy and pretty much ready to be installed.

I was tossing up between a Cushioned Button and a full face heavy duty but considering the driveability and availability of the kit I ended up with the standard HD kit TYK-7332HD from Exedy. After driving the car I think this setup is pretty much spot on for street/daily drive so far.
The kit came with an alignment tool, release bearing and spigot however the spring for the release bearing was wrong so I had to reuse the old one.
Setting a deadline
I planned to get the whole swap done in 1 weekend as I needed to get back to work, I took the Monday off just in case as well which ended up working out in my case as I hadn’t prepared the driveshaft before hand and would be measuring the length as I went.
Parts
The parts and tools list:
Clutch and brake pedal from an IS200
Master Cylinder and hard and soft lines from IS200, Soft line and slave if you can get it otherwise the w58 slave is the same
W58 Remote shifter (aka Tripod Mount), mine was from a MK4 NA Supra
NA 2JZ Single Mass flywheel from MK4 Supra
New Flywheel and clutch pressure plate bolts
ARP flywheel bolts sku 203-2802
2.5L gear oil 75-90w GL4 (Penrite ProGear is what i used)
Clutch Kit including
clutch and pressure plate
release bearing
spigot bearing, auto and manual cranks are the same so spigot goes straight in. In David’s words “Crank is Crank”
alignment tool (optional but makes life easier and normally included)
Brake fluid for clutch 1 small bottle should be fine
Loctite high strength for flywheel bolts
Loctite medium strength for clutch and driveshaft bolts
Manual Shifter Boot
Supra W58 rubber transmission mount
Reuse the auto trans crossmember but flipped and file out the holes to fit
W58 slip yoke or the supra driveshaft to cut it off
30mm hole saw to drill hole for master cylinder
3mm pilot bit and 8mm drill bit for master cylinder stud holes
Access to a welder, having it with you makes test fitting the shifter much easier.
Soldering iron or crimp terminals to join some wires
Things to make or modify and optionals
Custom driveshaft
I reused my rear section and had a new front section made 744mm from the gearbox seal to the center carrier bolts
UPDATE We have found that an IS200 j160 driveshaft fits the w58 and the front section is the correct length when used with the is300 auto rear half. Just get the pair balanced after you give it a test run.
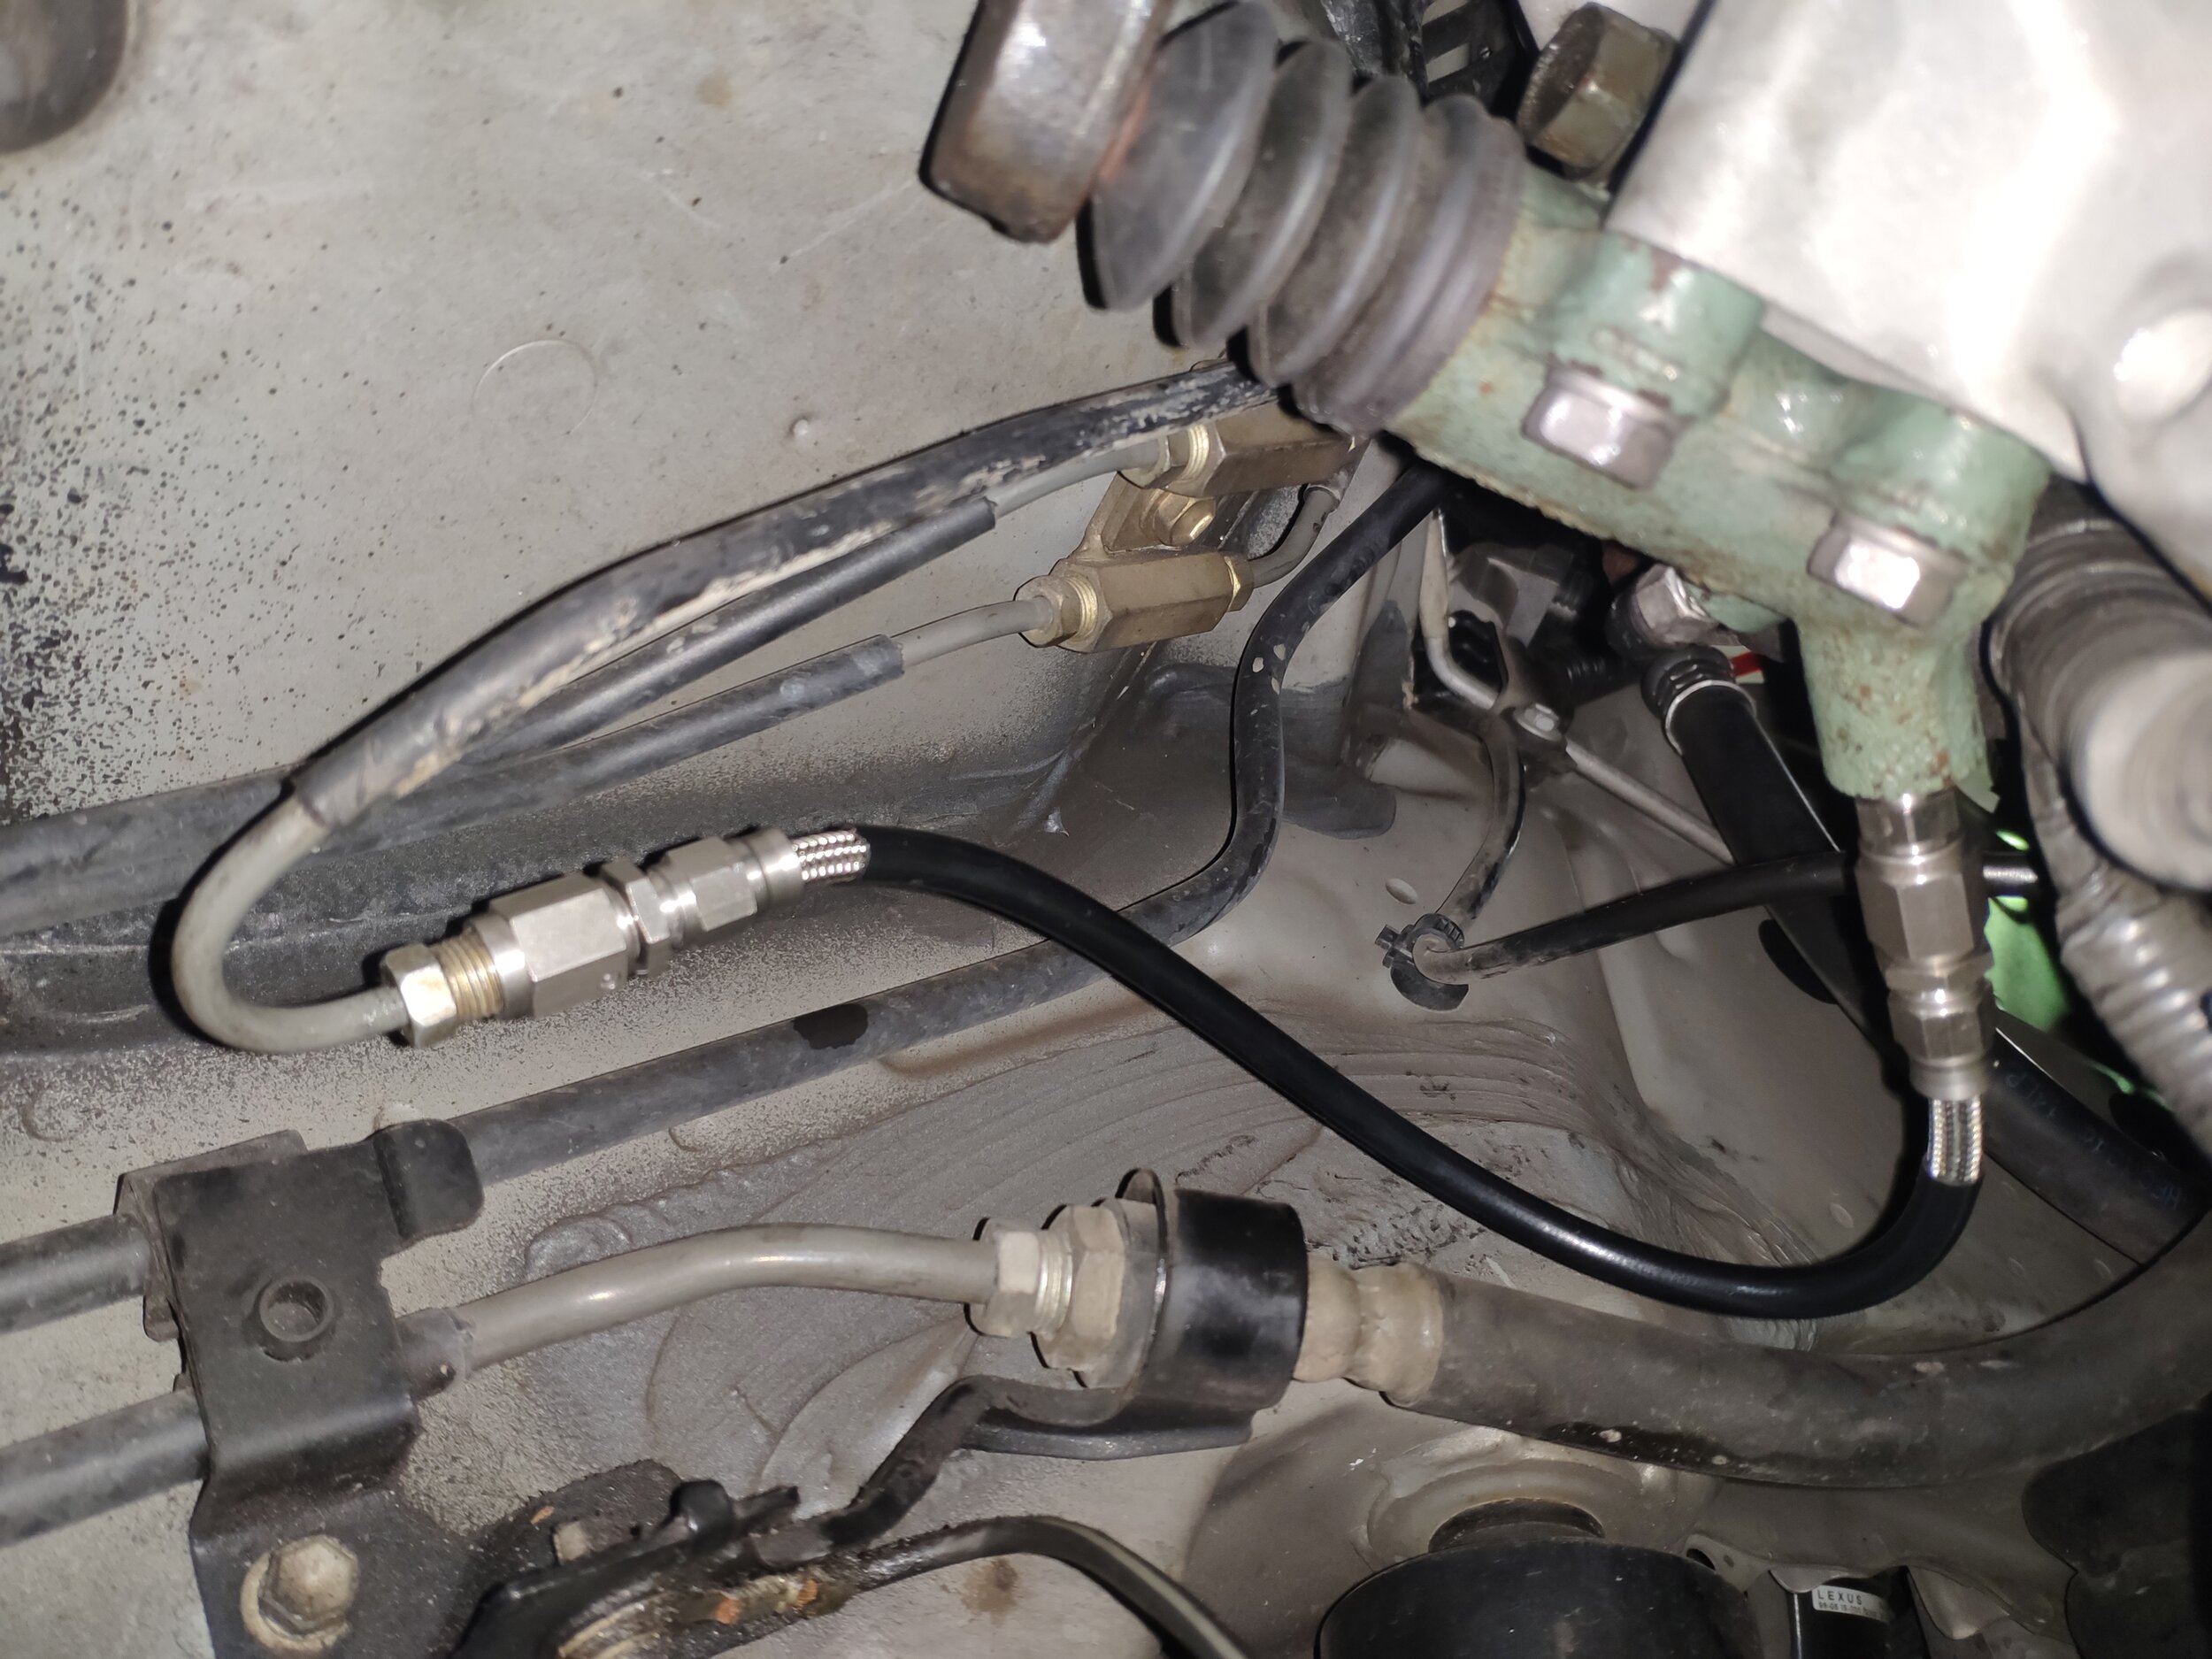
Soft Clutch line if you didn’t get the oem one, These are the Aeroflow parts I used.
AF204-03 m10x1.0 to -3an hose
AF351-03 m10x1.0 male to -3an male
AF201-03 -3an female to -3an hose
200 series line teflon coat -3an 1metre minimum quantity
Optional Fluid Pump bottle, makes filling the trans a breeze
Sacrificial shifter to modify needs to be moved about 60mm forward
Modify the auto trans cross member or make a new one
Optional Rear main seal, may as well with the box off
Bridge Neutral switch on auto harness
Wire up reverse wires
Optional flywheel inspection plug, they tend to explode after living under the car for 17 years. Toyota part no. 90950-01809
Transmission tunnel has to be cut and sealed
Auto Removal
First things first getting the A650e out. It’s pretty straight forward.
Drain the oil, 14mm sump plug
Remove the driveshaft, can be done with the exhaust in but its easier to do it with them out. Two 14mm spanners or a spanner and a rattle gun. The center bearing is also 14mm, if you drop this first you can get a 14mm socket on the driveshaft bolts in the center.
Remove the heat exchanger hardlines. Undo the lines on the auto sump and remove the soft lines on the exchanger. I left the coolant lines on and heat exhanger mounted
Remove the auto shifter. The center console and shifter surround have to come out for this. Then remove the 4 bolts holding the shifter and the linkage under the car.
Remove the auto harness plugs that you can reach, some will be easier when you drop the auto box
Undo the torque converter flex plate bolts. Remove the inspection plug, these explode so best have a spare or just some tape for now, then undo each bolt on the flex plate. Spin the engine over with a 22mm socket on the harmonic balancer.
Remove battery to take the starter out safely.
Remove the auto dip stick. There’s a 10mm bolt on the underside of the intake manifold and a clamp further down and then you should be able to pull the top half of the tube out of the bottom half that runs into the sump.
Remove Starter motor, two 14mm bolts plus the battery cable and signal.
Undo the gearbox bell housing bolts, 14mm and 17mm. There will be two long 14mm bolts on the starter motor. We found the best way to do this is support the auto trans with a jack and then undo the crossmember and lower the trans to access the top 17mm bolts. Use lots of extensions and a decent ratchet. I had the ratchet above the output shaft on the gearbox to crack them before I could use the rattle gun. Make sure you support the gearbox with a jack or two here as once the torque converter comes out of the crank it will come straight down and out.
Remove the rest of the harness plugs if you haven’t already and the gearbox should be completely free.
Access with trans dropped and shifter removed.

Flywheel housing plug exploded

Leaky rear main seal

The W58 swap brains trust
Pedals and master install


Not many photos but this ones pretty straight forward too. I did this the weekend before the swap to make life easier. The brake pedal mounts with a pivot and a bolt at the top. Don’t lose the plastic inserts for the top. The clutch pedal uses a M8 STD thread for the top and then the two threads from the master cylinder through the firewall which are also M8 STD. Inside the cabin there will be a cut out in the foam where the pedal/master sits. The master cylinder from a manual IS200 uses a 30mm hole for the rod to pass through. I estimated where I wanted it and marked the stud holes then I used a 30mm holesaw to drill the center. I used a file to adjust and cleanup the hole as I needed. Two people would make putting the pedal in a piece of cake or you can fuck around like I did for an hour trying to get the studs and the pedal to line up.
One thing to note I found that it was pretty much impossible to feed the hardline down with the auto in the way. It clips into the clips with the other hardlines that run along the top of the firewall. We installed mine with the box out and the motor tilted on a jack.
Installing Clutch and Flywheel

Exedy pressure plate showing the pink bits

rear main out for replacement
Now it’s the fun stuff. Remove the auto flex plate and spacers, if you don’t have a rattle gun have a 2nd person hold the harmonic balancer again or put a long breaker bar on it so it jams against the floor. Inspect the rear main seal and replace if you need to. I had suspected mine was leaking for a while so I got a new one for $25 to do while I had it all off.
To install the spigot find a socket that is that is the same size as the outer race and use a hammer to tap it in till it seats against the step inside the crank, you’ll hear when it seats as the sound will change. I had a local shop machine my flywheel for me it only ran me $55 and was done within the day. I also picked up new ARP flywheel bolts part no. 203-2802 These are used for 4AGE engines as well as the 1JZ and 2JZ. The kit comes with instructions and their moly fastener lube. It is recommended to put high strength loctite on the threads and a smear of the fastener lube under the head of the bolt. I ran them in with the torque mode on my rattle gun in an alternating pattern then torqued them to 70ftlb as per the ARP instructions. I couldn’t get new clutch pressure plate bolts so I re used the old ones with a dab of medium strength loctite, I torqued these down by hand in alternating pattern slowly to bring it down equally on the clutch disc to 25ftlb. Good time to make sure you installed the friction disc the correct way as well.
Gearbox install
Before the gearbox goes in is also a good time to run the hardline down the firewall behind the engine. Having two people made this easier to guide it down as the hooked section at the end can be a pain. This is where I started to build my soft line. If you haven’t used aeroflow compression fittings before look up a guide on how to build them. I connected the hardline side up and got ready to cut it to size once the slave cylinder was fitted.
To get the gearbox in I removed the headers to clear the bell housing and left the slave cylinder off. Removing the headers is basically impossible unless you take the heat shields off the cats and remove the uni joints on the steering column, but I had a set of decatted headers I wanted to install anyway so we took the time to remove them.
Having two jacks makes this part a lot easier, jack up the front of the engine, we used a piece of wood under the front of the sump just behind the harmonic balancer on the block, to angle the motor back and used another jack under the W58 to lift it up. Line it all up and wiggle it once its almost all the way in to make sure the input shaft seats into the spigot. Once we were confident it was going in square we used the bolts to pull it in making sure the gap was equal and alternating bolts.
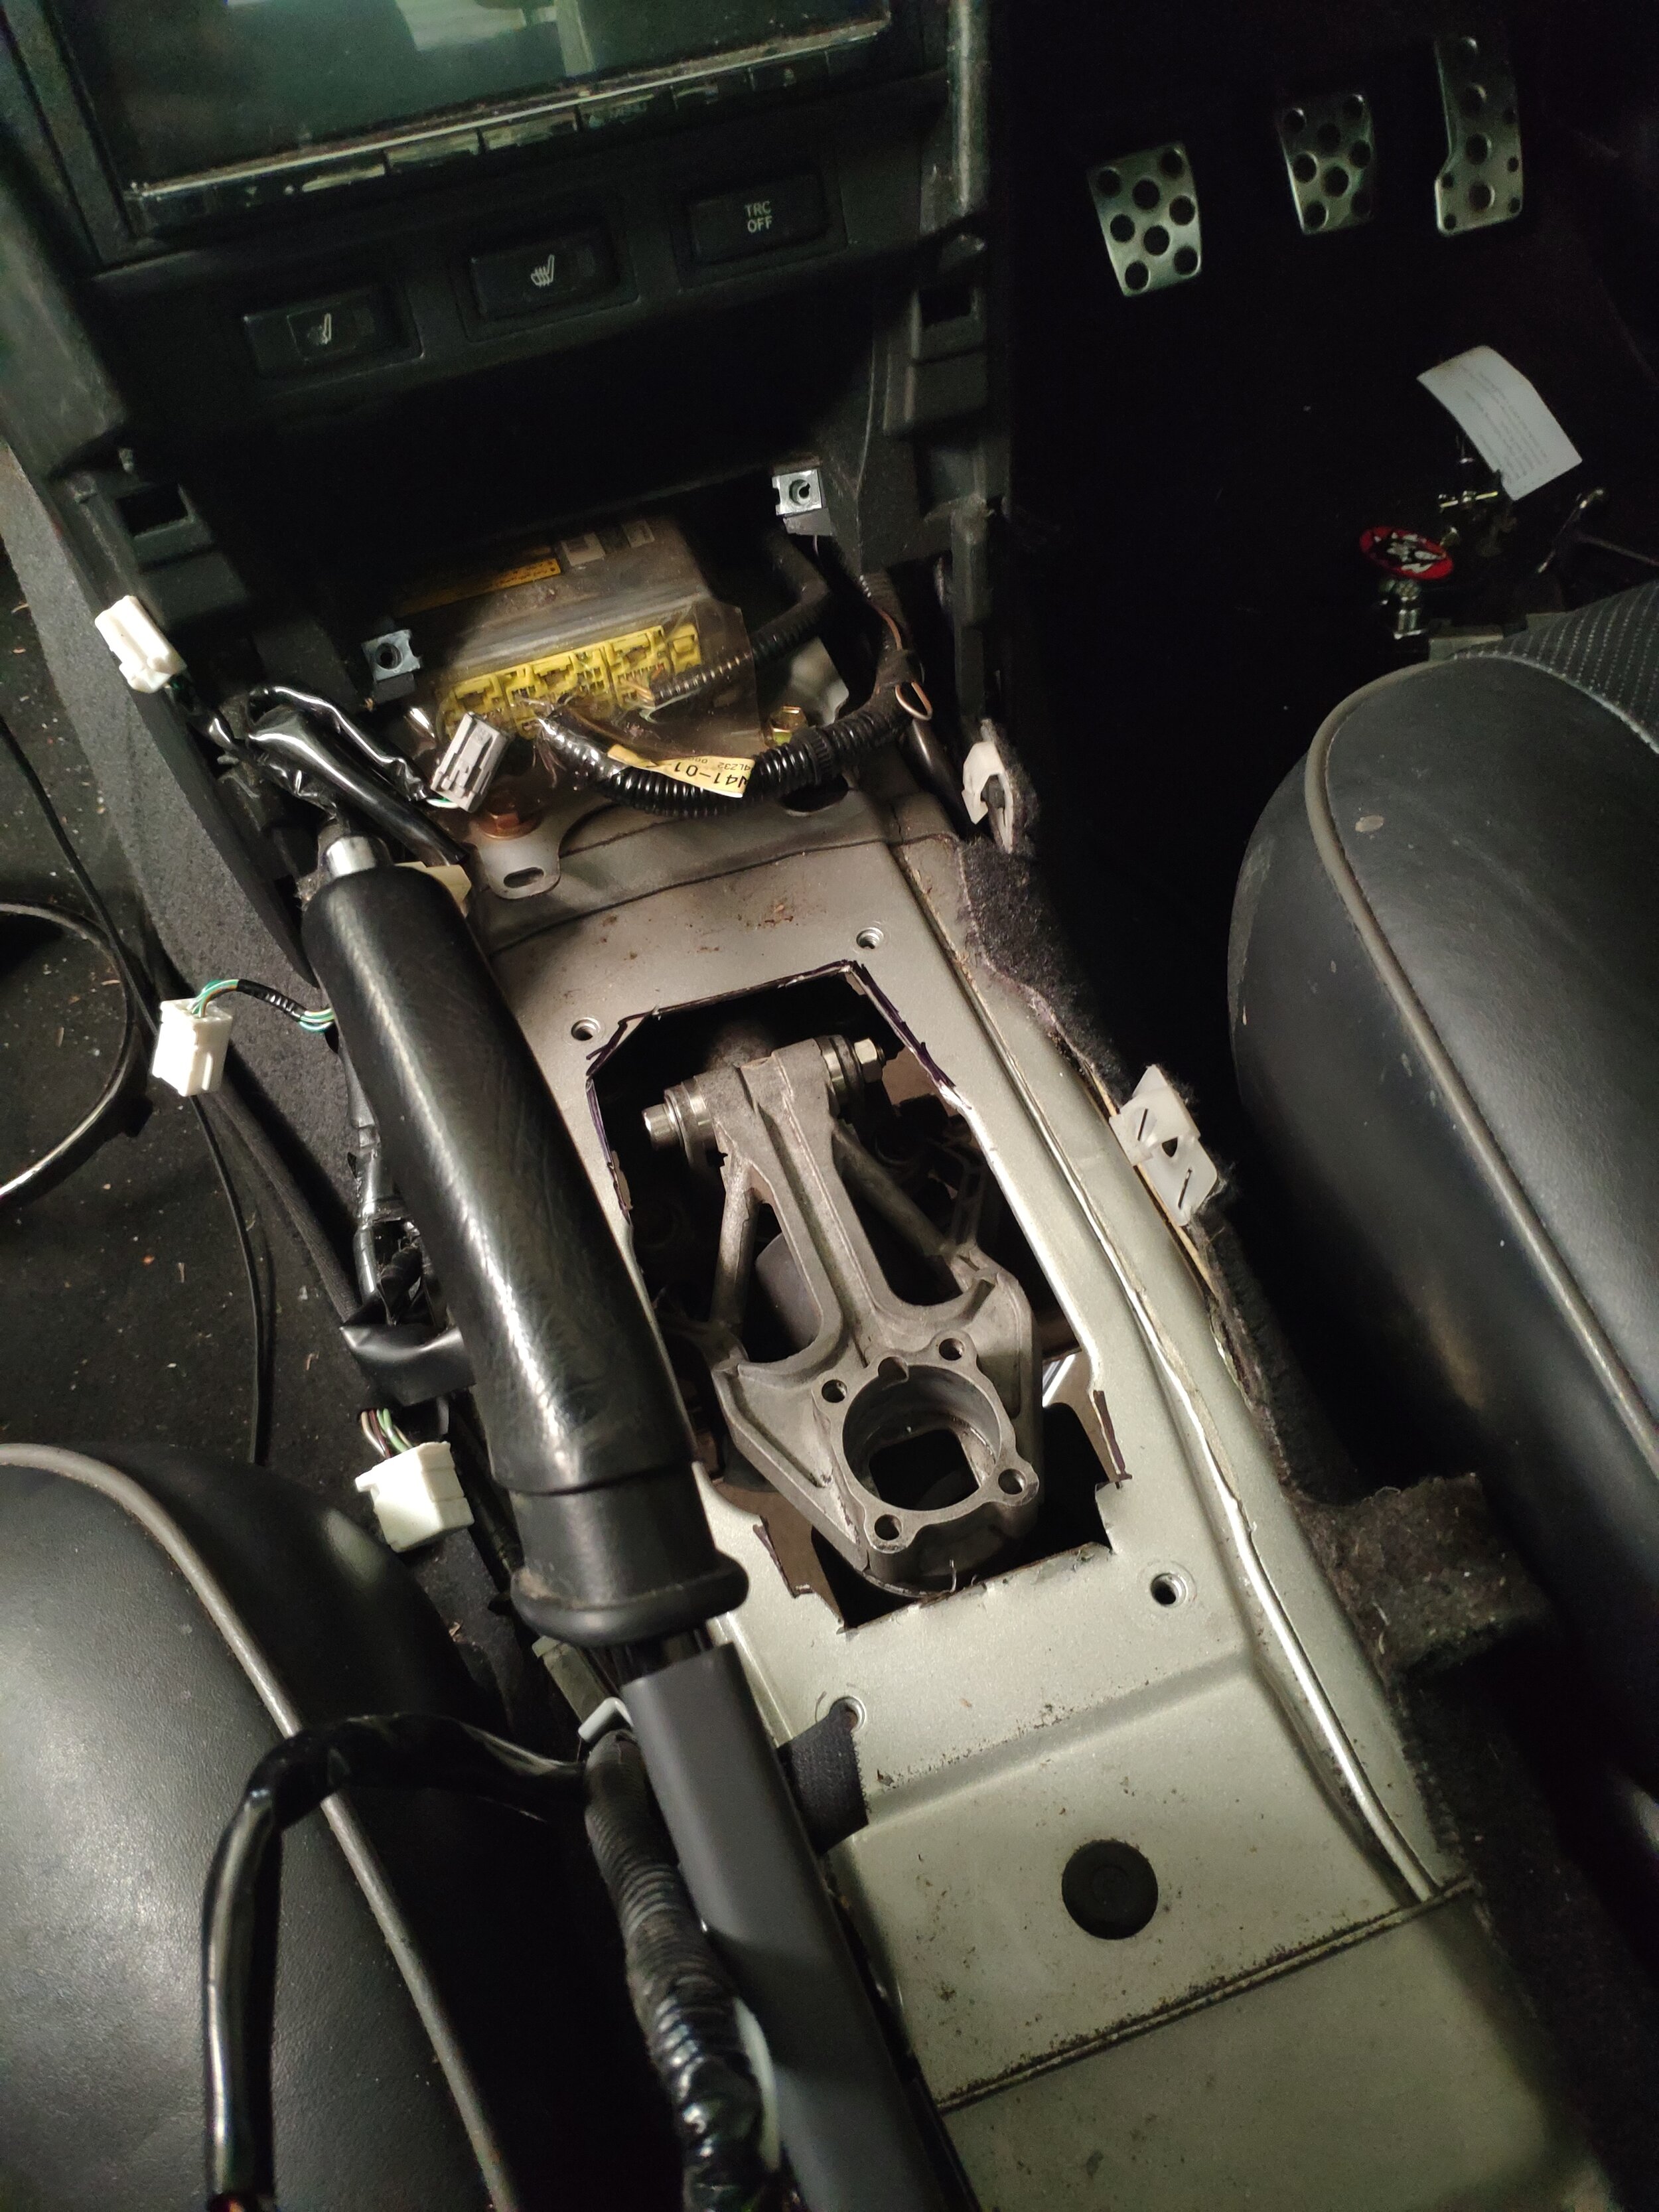

At this point with the slave mounted and the gearbox connected its time to cut the tunnel. I would recommend covering a lot more than I did here but hey the tunnels cut and the tripod shifter fits. I’ve seen people weld in the manual tunnel here to clean this up and I plan to have something similar done eventually but for now while I wait for my rubber boot I just put some gaffa tape to seal it.
To mount the W58 up once you make sure it clears fit the rubber mount back onto the W58 if you have removed it, and put the IS300 auto crossmember up with it and see how far out the holes are. The crossmember can go both ways but is much closer on one side. I put it in a vice and used a round bastard file to elongate the holes as they were only 4mm out. Once this was done I put the crossmember on and zipped it up.
HArness wiring
I didn’t have much to do with this part but the information was found pretty easily on the forums with a quick search.
https://www.my.is/threads/diy-auto-to-manual-wiring-reverse-lights-speedometer.443995/
There are two large plugs on the a650e auto loom. One of them is a 9 pin connector with two larger plugs as seen they are red in colour with black wires coming out of the connector. These need to be bridged to each to allow the starter to crank.

Pic from my.is forum post, join together to allow starter to crank.
The red wires with the blue from the same plug need to be joined to the reverse switch on the transmission as seen on in the pictures below. I used bullet connectors on mine but solder and heatshrink is much neater.

Picture from my.is forum post. Reverse switch connected to auto harness.

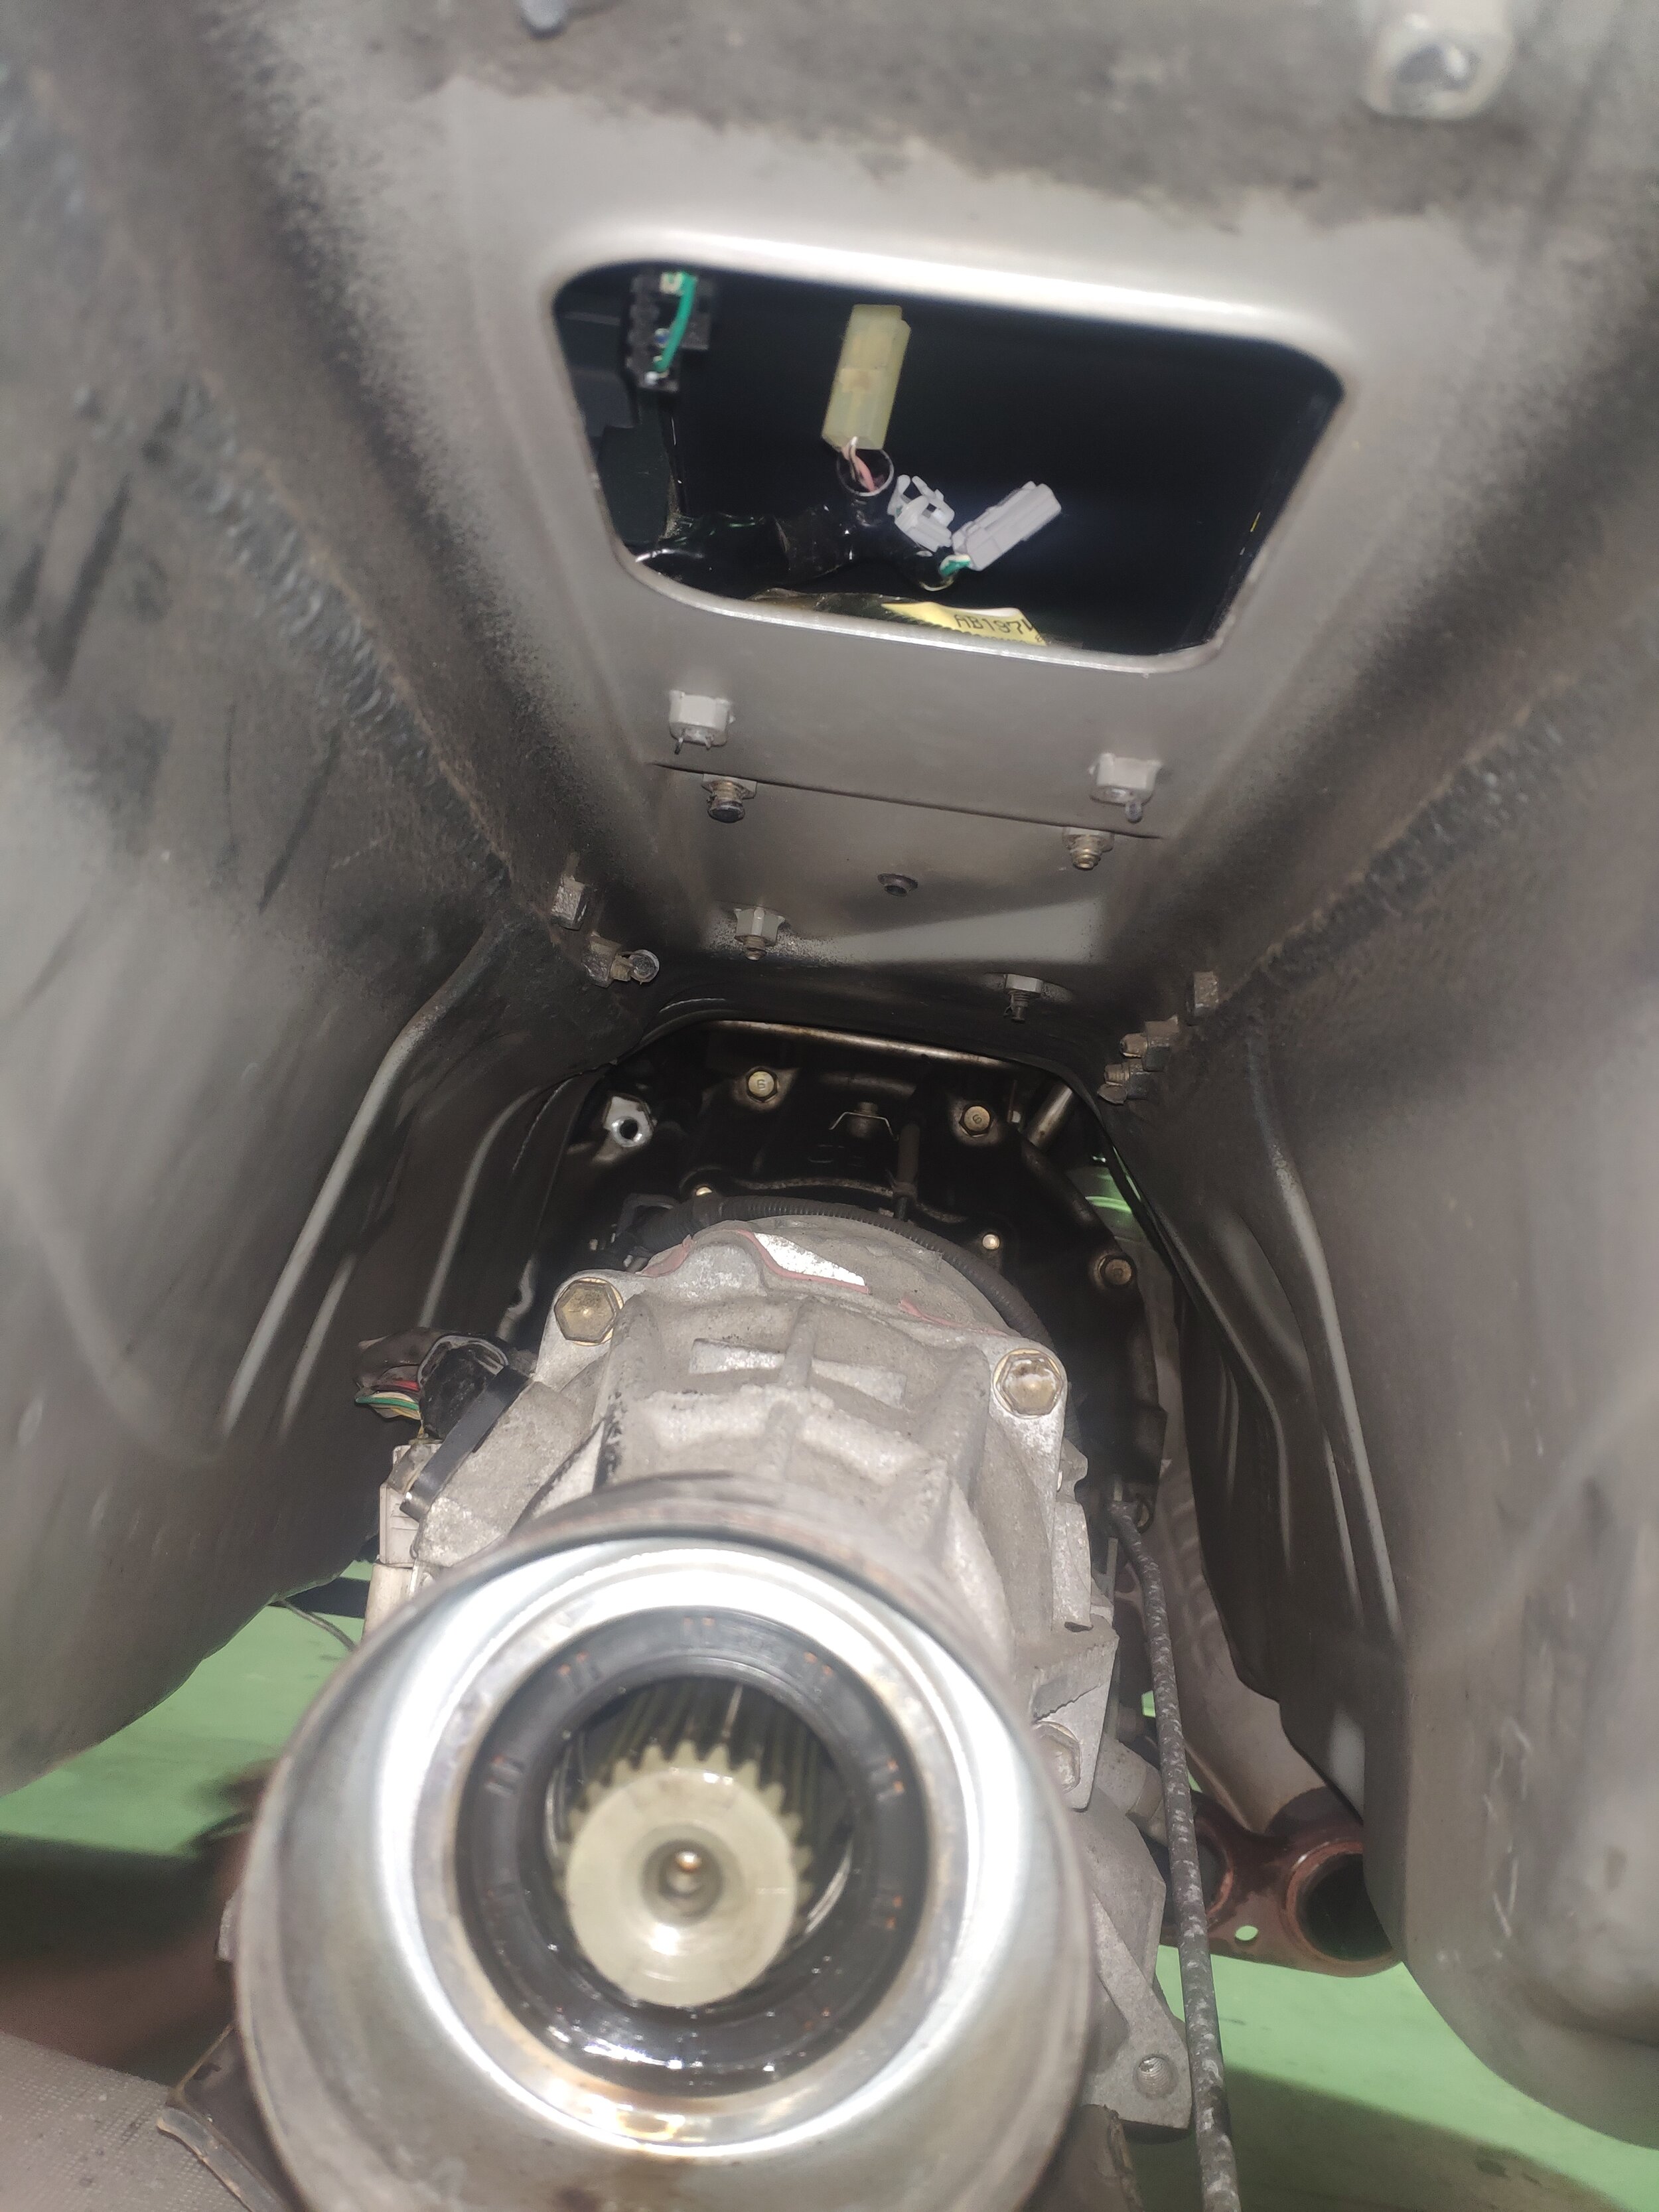
The harness coming out of the LHS of the W58 is the reverse switch.
Shifter mod


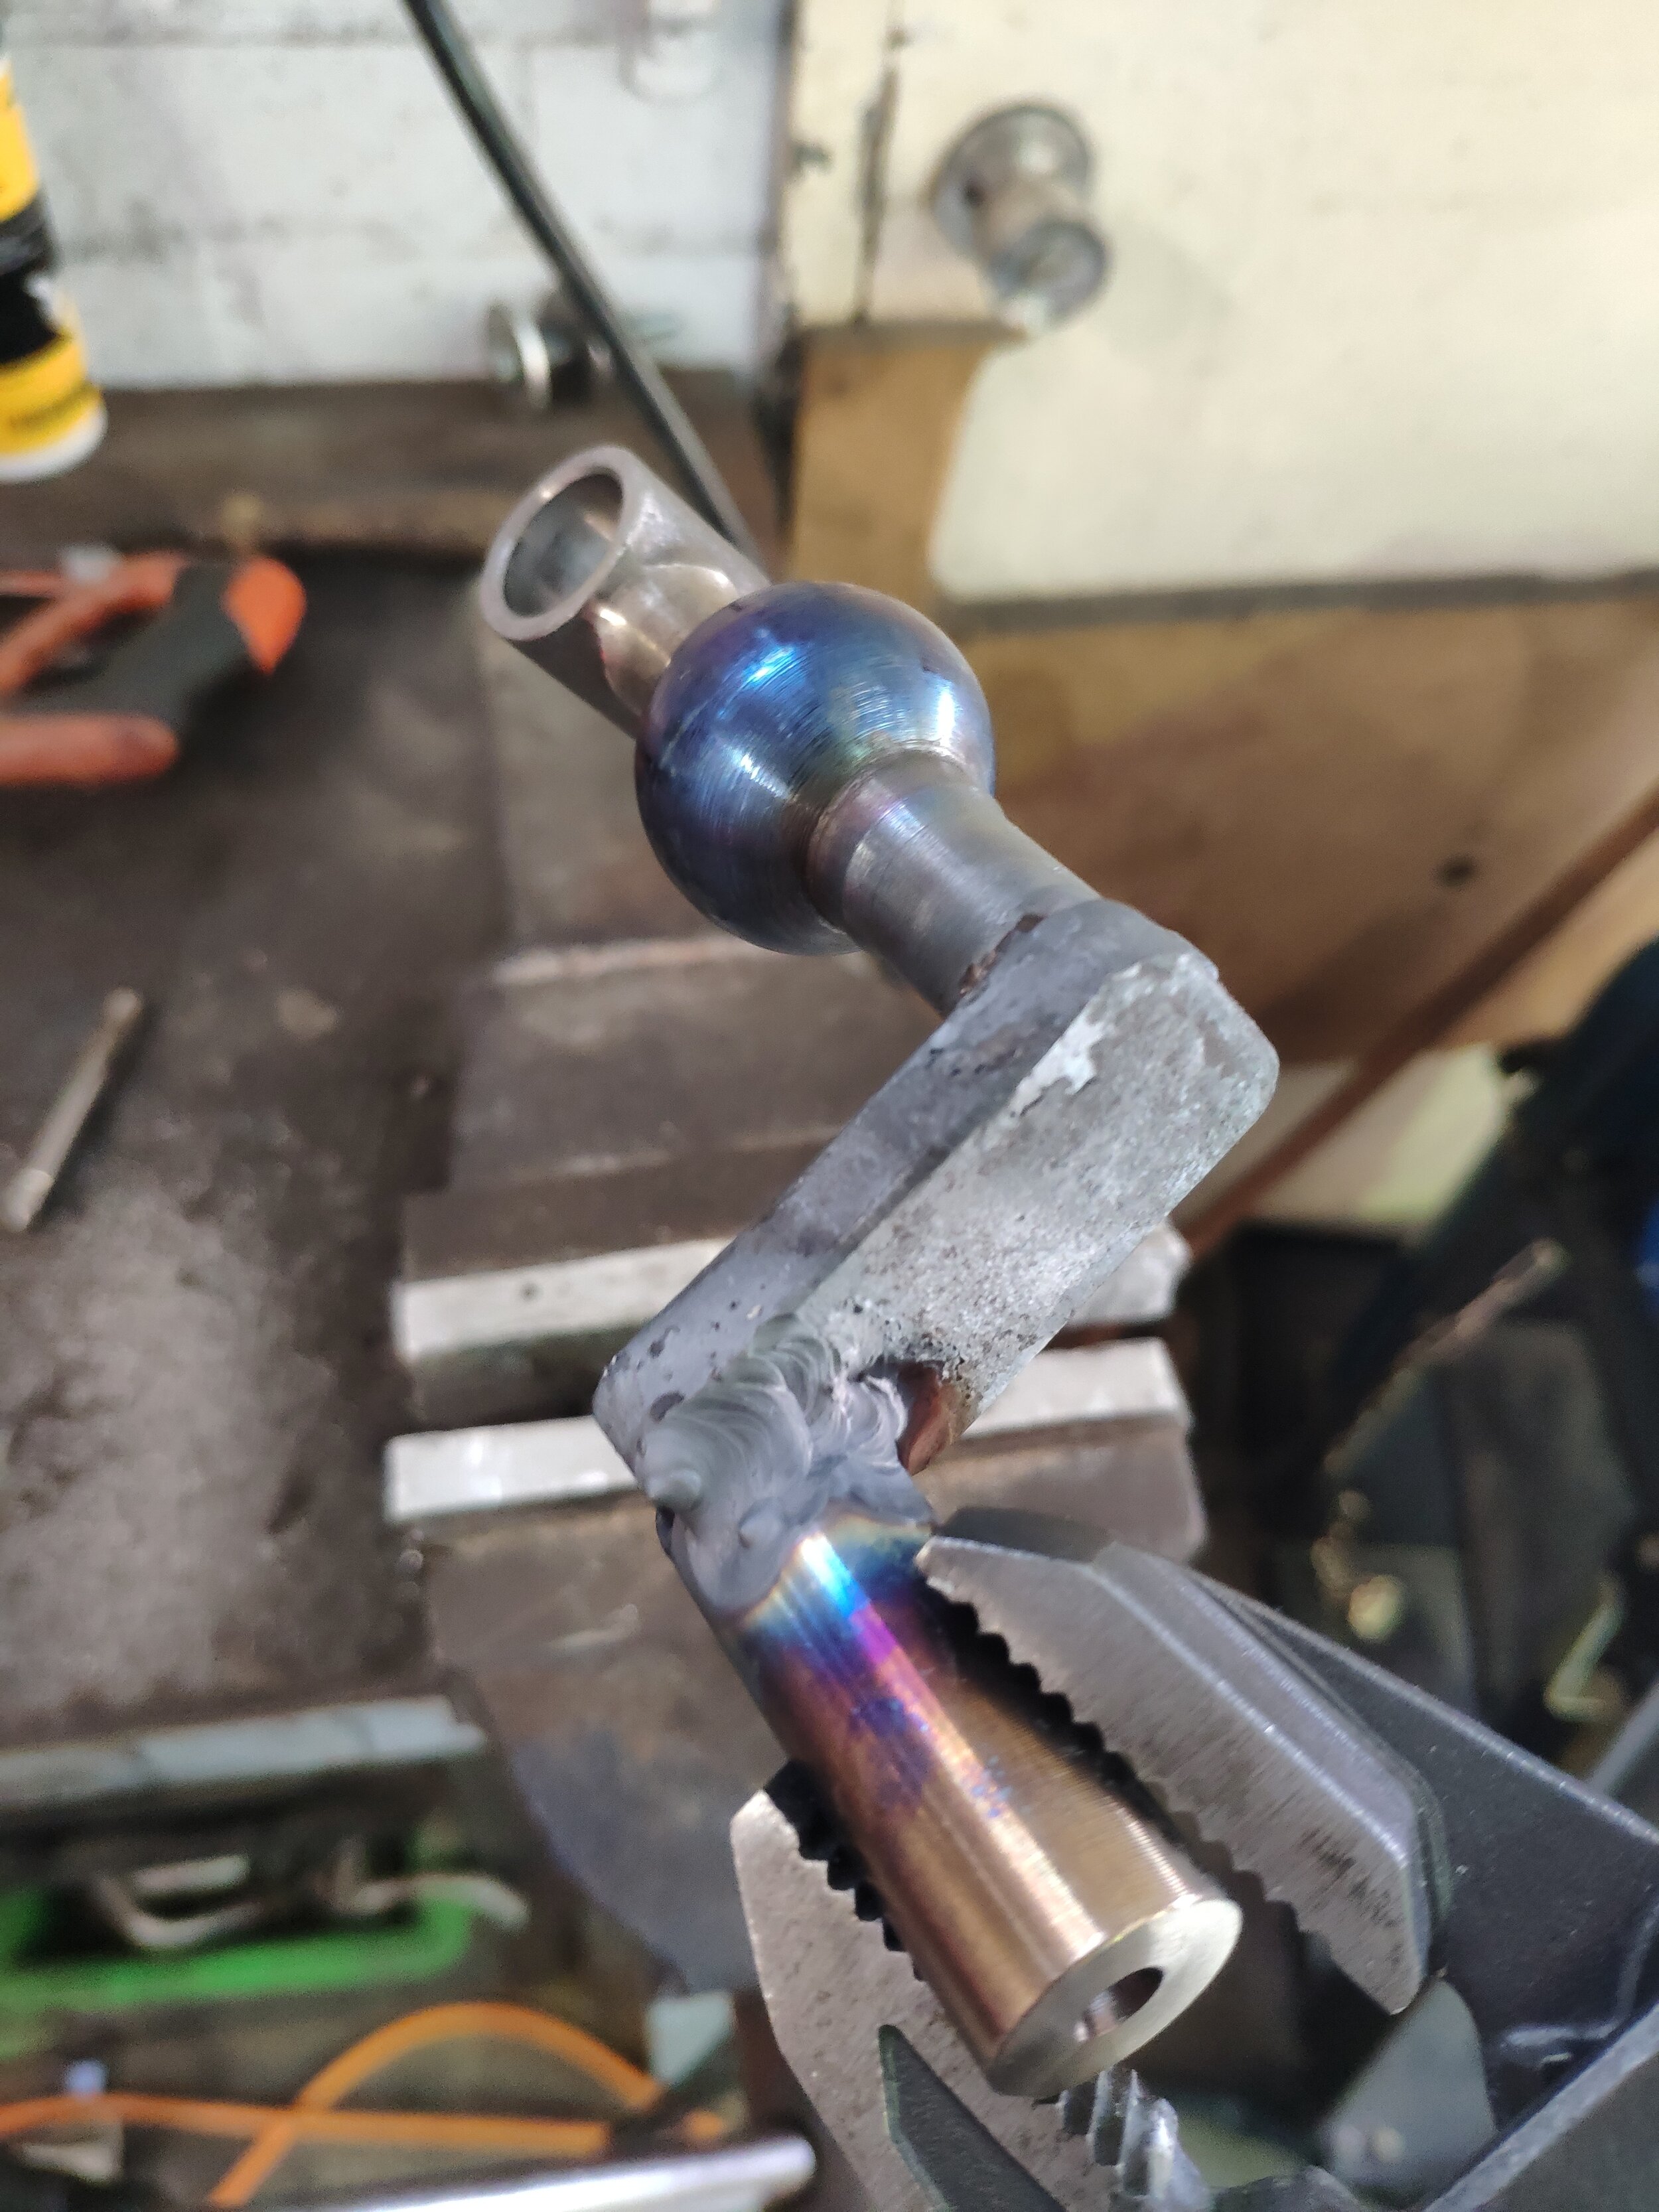
Once you put the surround in you can see how much further the shifter needs to be moved forward. If you only have the stock one I would be wary welding it as there is a rubber insert inside it. I had this K-tuned honda shifter lying around so I just chopped it up but basically you just need to have a Z added to the shifter to move it about 60mm forward. I used 309 filler rod to join the mild steel plate to the stainless rod. Just make sure that you won’t be punching the dash when you adjust it, I tacked it all together and then mounted it up without the bushes to get a rough idea of how far it would throw and that it wouldn’t hit the surround.

Custom Driveshaft
As far as I know there are no existing driveshafts that will bolt up. You can reuse your old rear section but will need to have a new front or entire custom driveshaft fabricated. I went to a local shop with both my old driveshafts and the front section with the W58 slip yoke from the supra. He got me to measure the from the seal to the center carrier bolts which for me was 744mm. This may vary but I used my mates to test which was measured at 739mm and it worked fine, feel free to use my measurement as a guide but best to measure your own once the box is in. Also important to take the rear section as well so they can balance it as one piece.
I was lucky enough to get mine back within 1 day but shops may differ and if you opt to get a stronger 1 piece. It cost me $500 from South Coast Driveshafts in Port Kembla as they had to retube the entire front section because it is longer than both the IS300 auto and supra manual shaft.


Finishing up
Once all of these are done and the interior is reassembled, you can bleed up the clutch and get ready for the test run. It was a big 3 days but with a bunch of mates and plenty of info on the internet it all came together in the end. Hopefully I can get some seat time in before the end of the year with the corona lockdown still affecting interstate and international travel, drift events might have to stay local for a while.